Manage Classes
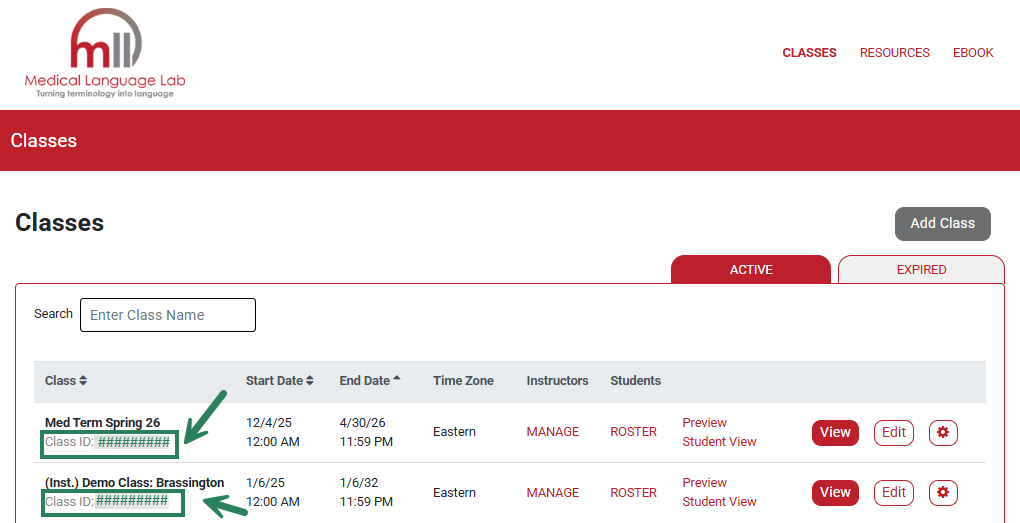
After creating your class(es), the class information will be displayed on your Classes page. Access this page at any time by selecting the Classes link at the top of your Medical Language Lab page. This is also the first page that you will see when you log into the Medical Language Lab platform.

Each class you create will have a unique Class ID. Please remember to provide your Class ID to your students. Many instructors put the Class ID in their syllabus and/or on their LMS. Students need the Class ID to enroll in your course.
Edit Class
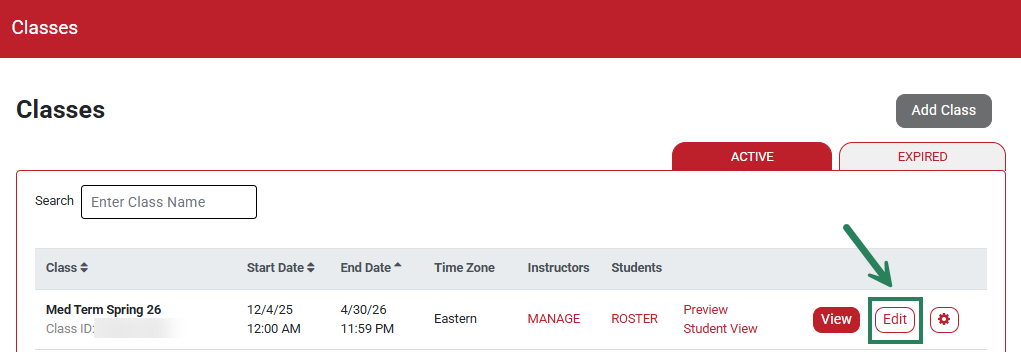
To make changes or adjustments to class settings (module content, grading rules, due dates, etc.,) select the "Edit" button in the line with your class name.
You will be taken to the Class Set-Up page, where you will find multiple options for updating your course:

Create Class (1) allows you to update your course title, start date and end date, as well as settings for Auto-Enroll and Independent Study.
Customize Content (2) allows you to change which modules and exercises are visible to your students, and rearrange the order of modules to match your syllabus.
Schedule Content (3) allows you to update the Start Dates and Due Dates for individual assignments.
Grading Options (4) allows you to change how each type of assignment is scored for credit in the gradebook.
Pretest & Posttest Assignments (5) allows you create and schedule Pretest and Posttest assignments for your students.
Summary (6) lets you review your course settings.
Once you have made your desired changes on a specific step in Class Set-Up, select the "Next Step" button to save your work.
For additional guidance on Class Set-Up in the Medical Language Lab, please visit our "Create a Class" article: Instructor: Create a Class: Medical Language Lab
Clone Class
If you teach multiple sections of the same course, you may want to clone an existing class. Cloning a class will create a copy with the same customization settings as the original.
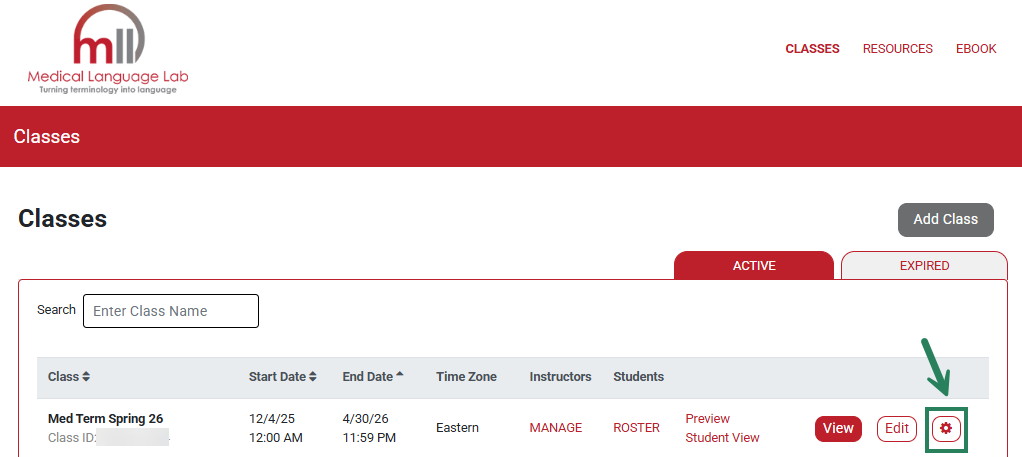
First, click the gear icon on the right side of the screen.
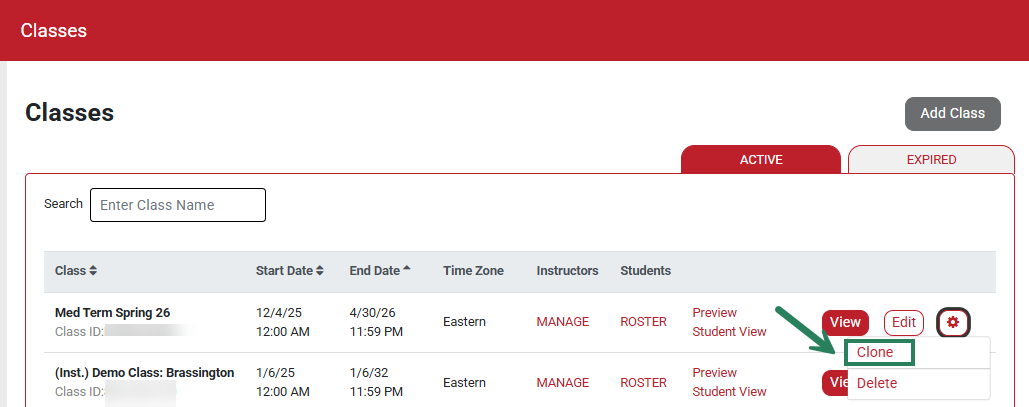
Next, select Clone from the settings dropdown.
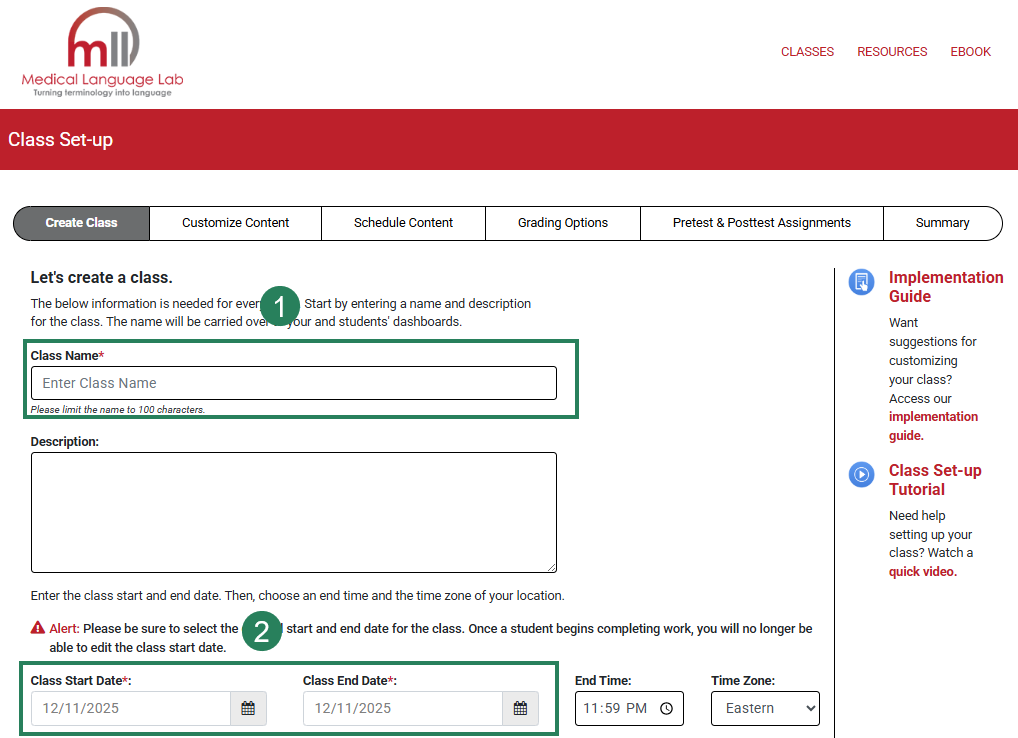
Enter a new class name (1) and set the appropriate start/end dates (2).
Click Next Step at the bottom of the page to save the new, cloned class.

Re-open Expired Class
After the End Date for a created class has passed, the class is marked as Expired. To re-open an expired course, click the Expired tab at the right side of your Classes page to reveal any expired classes.

Find the class in question, then click Reopen.

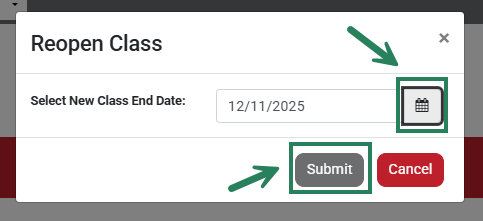
Set a new End Date, then click Submit.
The re-opened class will be listed under Active.
Delete Class
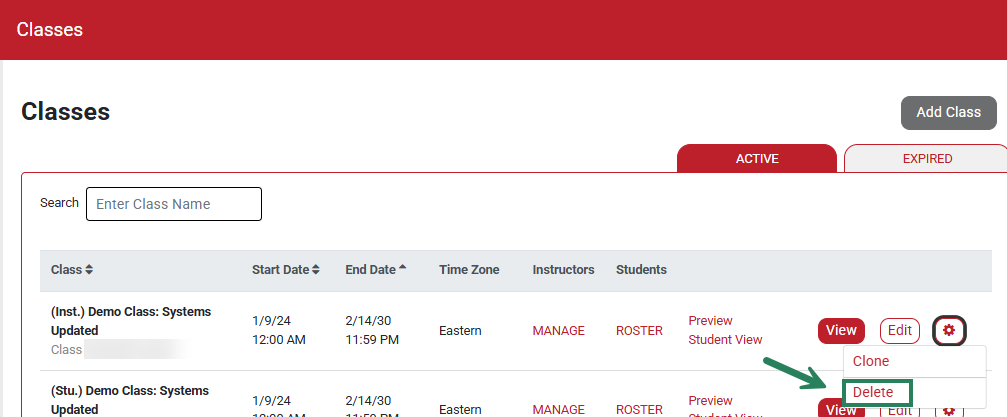
To delete a class, begin by clicking the gear icon on the right side of the screen.

Then click the Delete option.
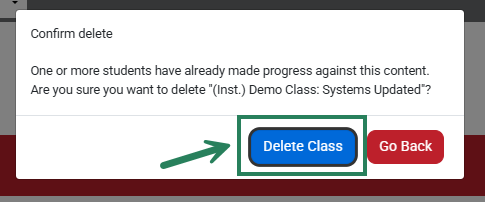
Click the Delete Class button in the pop-up to confirm the deletion.
